Yarn (noun) 1. spun thread used for crochet 2. (informal) a long or rambling story

31-01-18
A Cygnet Yarns earwarmer

A gorgeous yarn
A gorgeous yarn

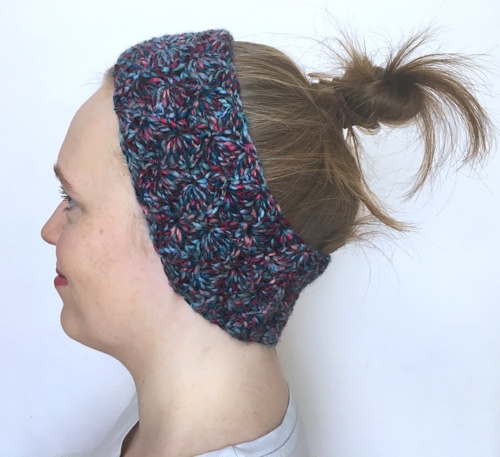
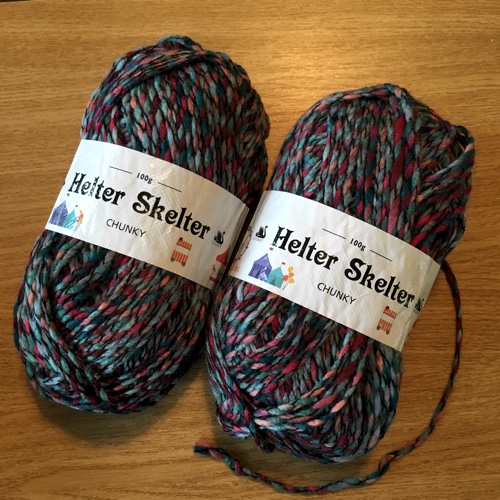
Recently, I was fortunate enough to receive some brand new yarn from Cygnet Yarns. This is a chunky weight multicoloured yarn called Helter Skelter. I’ve looked on their site and it doesn’t seem to be released yet!

It works up really nicely, with blues and pinks twisting around each other. When worked up in treble crochet you get lovely flecks of all the different colours.

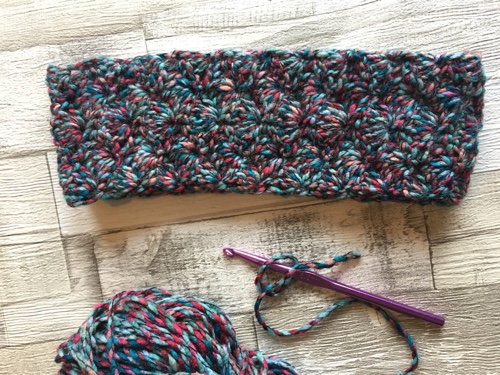
With the weather changing and getting warmer I decided it was time to stop wearing my hat and hook up something a little cooler for the school run. I still want my ears covered in the frosty mornings, but like having my hair tied up away from my face. I settled on a pattern using shell stitch, which shows off the colours of the yarn rather nicely without too much fussy textured detail.

The ear warmer is made in shell stitch along the width of the piece

Free Pattern: Shell stitch ear warmer

Pattern Notes
This simple ear warmer headband is along the width of the material to the desired length, if you’re making it for yourself you can regularly wrap it around your head until it is the length you need. If you’re making a gift then stop at 20" (50.5 cm) for teenagers, 22" (56 cm) for adult or 24" (61 cm) for large adult. This is around the standard sizes for hats and includes a snug fit to allow the headband to stretch a little.

This pattern specifically uses the new Helter Skelter yarn from Cygnet Yarns, however it could be substituted with other multicoloured yarns of the same weight category (Chunky, weight 5).

Stitch counts are given in [square brackets] at the end of each row.

Materials
1 ball of Cygnet Yarn Helter Skelter Chunky Yarn in Tornado shade
6 mm hook

Crochet Terms
Written in UK terms:

TermUK termUS term
ch1chain 1chain 1
dcdouble crochetsingle crochet
htrhalf treble crochethalf double crochet
sk2skip 2 stitchesskip 2 stitches
sl stslip stitchslip stitch
ststitchstitch
trtreble crochetdouble crochet

Pattern

  1. Foundation Chain - chain 13.
  2. ch1, dc in each ch across [13 dc]
  3. ch3 (counts as tr), 2 tr in same space, sk2, dc, sk2, 5tr, sk2, dc, sk2, 3tr [2 half shells, 2 dc, 1 full shell]
  4. ch1, dc, 5tr in next dc, sk2, dc in middle tr, sk2, 5tr in next dc, sk2, dc in last st [dc, shell, dc, shell, dc]

Rows 3 & 4 set the pattern for the piece. Repeat the pattern until 0.5" (1cm) under the desired length.

Last row. ch1, dc, *(dc, htr, tr, htr, dc, dc)* repeat the section between the *s twice

Joining. Fold the piece in half with right sides facing. Slip stitch the ends together in the outside loops. Turn the head band inside out. All done!

Nice and warm ears
Nice and warm ears

07-01-18
Lets crochet the Periodic Table

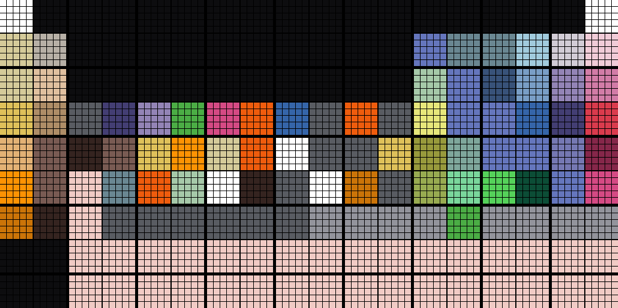
I come from a biochemistry background and have been wondering for a while if it’d be possible to crochet the Periodic Table. So what would a Periodic Table afghan look like? I decided to use my site JemsGraphs.com to draw out the basic shape and choose from the suite of 88 colours of Stylecraft Special DK to make a gorgeous patchwork effect.

Master layout for the Periodic Table afghan

My draft pattern above showcases the 118 elements, which means 118 different crocheted blocks. That’s quite a lot of blocks! The hard thing will be joining them. I’m thinking I’ll join them one group of elements at a time otherwise it’ll never get finished.

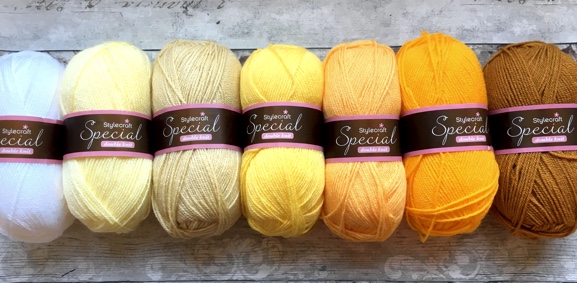
I’ve chosen a different colour for each of the eight main groups of the table, starting with all yellows for group one and going through to pinks for group eight. I’ve chosen blues for the non metals and greens for groups five and six, plus my favourite colour from Nuts About Squares - Bluebell - for the blocks where the elements exhibit both metal and non-metal properties.

The yarns for Group One, lots of shades of yellow

It was harder to pick colours for the transition metal block. I wanted to pick colours which represented the element, as the transition metals can be very colourful. While researching this in more depth, I found this was true for the elements at the top of the block, but those at the bottom are heavier and some are unstable so there’s never been any colour chemistry with them. I’ve left them in silver and grey for now but I might change my mind later.

I’ve left the block of lanthanoids and actinoids in an apricot colour for now, I might put one of them in a slightly different pink, or I might mix up the colours more like in the rest of the transition block. I plan to crochet the transition block elements after groups one to eight so I can make those decisions much, much later!

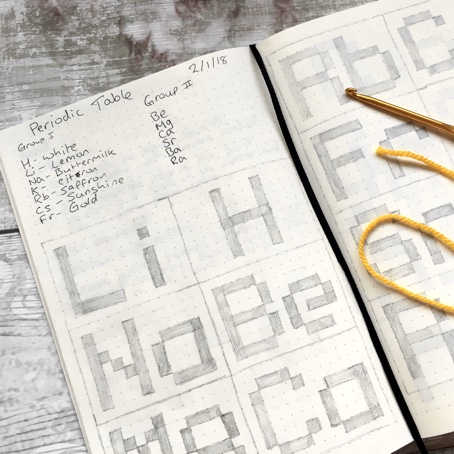
My initial patterns for some of the Group One and Group Two elements

With 118 blocks, plus joining time, I’m hoping I can make this in about a year or 18 months. That means two or three blocks a week, but I’ve already made up Hydrogen in white treble crochet and it’s fairly quick… so hopefully it’ll be finished sooner rather than later!

04-05-17
A Rey of sun for Star Wars Day

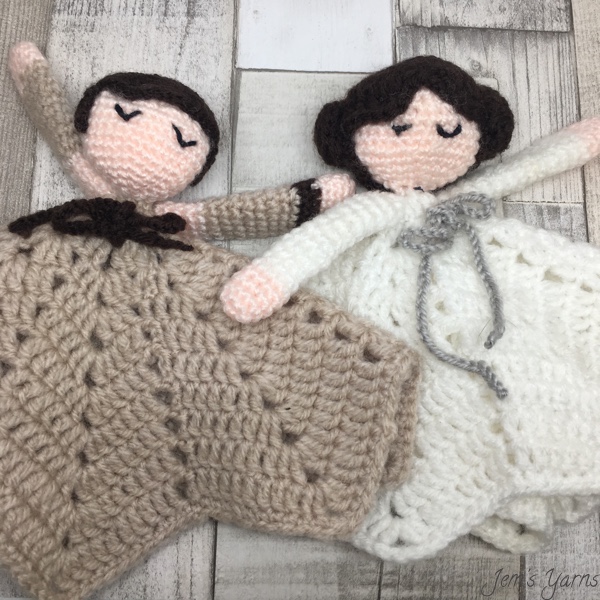
Two lovely lovies
Two lovely lovies

It’s May the fourth and Star Wars Day! I am a huge Star Wars fan, so one of the first patterns I ever followed was for Princess Leia. I found it easy to follow, and she’s a cute lovie who sits on my headboard.

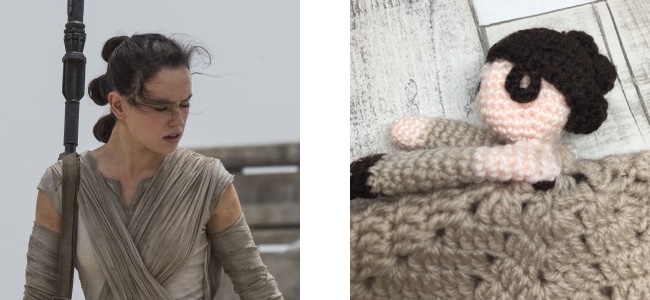
Back at the release of The Force Awakens, I decided to adapt the pattern to make Rey. I absolutely love this character, she’s strong and confident, and she’s a tinkerer; she’s right up my street.

Free Pattern: Star Wars Rey Lovie Pattern

Pattern Notes
This pattern references the Princess Leia pattern from Stuff Susie Made, so make sure to have a look at that page too. The dress is made in joined rounds with a slip stitch join, however the head and arms can be made in continuous rounds if you choose to do so. I used a 4mm hook for the dress as it’s quite lacy, then went down to a 3mm hook for the head and arms to avoid the stuffing showing in holes.

This pattern is free because the character belongs to Disney. So feel free to make one, but remember you shouldn't sell items made from the pattern because you don't have the licensing.

Crochet terms
I’ve written this pattern in American terms to go hand in hand with the reference pattern. (I usually write in British terms, but that would be too confusing here). Here’s what the abbreviations mean with UK terms alongside.

TermUS termUK terms
dcdouble crochettreble crochet
ch1chain 1chain 1
scsingle crochetdouble crochet
sc incsingle crochet increasework two double crochet into the same stitch
sl stslip stitchslip stitch

The number of stitches in each round is given in brackets, it’s a good idea to keep count!

Materials
Double knit weight yarn in flesh tone, beige and dark brown. I used Stylecraft Special DK in Soft Peach, Parchment and Dark Brown respectively. You also need a 4mm hook, a 3mm hook, toy stuffing and black embroidery thread.

Dress and head
Follow the pattern at Stuff Susie Made for the dress and head, using beige and flesh yarn. Remember to leave a long tail of yarn from the head as you’ll need this for sewing later.

Hair
The hair piece is stitched on top of head like a skull cap. You first make a circle, then add a loop of chains on each side of the hair. You also need to make up three small buns which will later be stitched in a vertical line on the back of the head.

It was quite fiddly to fit all the buns in as well as the strands of hair at the side of Rey's head

Using dark brown:

  1. work 6 sc into a magic ring, join round with sl st. (6)
  2. sc inc into each st (12)
  3. *sc, sc inc* repeat 6 times (18)
  4. *2 sc, sc inc* repeat 6 times (24)
  5. *3 sc, sc inc* repeat 6 times (30)
  6. *4 , sc inc* repeat 6 times (36)
  7. *5 sc, sc inc* repeat 6 times (42) Fasten off.

Now were are going to make a chain for the wisp of hair over the ear, the back of her hair and then the wisp of hair over the opposite ear.

  1. ch10, sl st to next sc, ch2 (counts as dc), 23 dc, ch10 sl st in next sc (24 dc and two ch10 loops)
  2. Turn your work, ch2 (counts as dc), 23 dc (24 dc) Fasten off.

Large bun

  1. work 6 sc into a magic ring (6)
  2. sc inc into each st (12)
  3. sc into each st (12) Fasten off.

Small buns - make two Work rounds 1 and 2 of the large bun.

Arms - make two

Again, this pattern is based on the pattern for Princess Leia, except with more colour changes as Rey has bare shoulders and wears a wrist cuff on one arm. For her left arm, follow this pattern, then for her right arm follow it again but rounds 6 and 7 should be in beige yarn.

  1. In flesh tone, work 5 sc into a magic ring (5)
  2. sc inc in every sc (10)
  3. to 5. sc in every sc (10)
  4. Switch to dark brown and sc in every sc (10)
  5. sc in every sc (10)
  6. Switch to beige and sc in every sc (10)
  7. to 15. sc in every sc (10)
  8. Switch to flesh tone and sc in every sc (10)
  9. to 19. sc in every sc (10) Fasten off.

Belt

Work a chain in dark brown yarn until it measures around 35 cm.

Making up

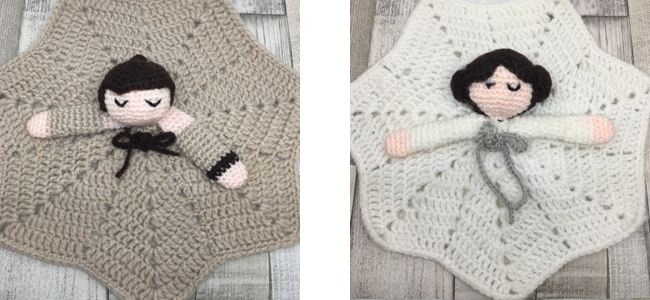
This should give you an idea of what you're aiming for, but don't forget to check out the reference pattern for some extra pointers
  1. Sew hair to head. You can choose to leave the ch10 wisps of hair free or use a stitch at in the middle of the chain to fix them to the sides of Rey’s head.
  2. Sew the three buns to the back of the head in a vertical line.
  3. Sew head to centre of the dress. I found it easiest to fold the dress into half and work the tail of yarn from the head through several stitches of the dress. You’ll find a way to do this securely, I’m sure.
  4. Sew the arms to the dress underneath the head. The one with the line of dark brown is Rey’s left arm.
  5. Thread the belt through the stitches of round 5 or 6, whichever looks better. You can then pull the belt a little tight so that you bunch up the early rounds of the dress to make the impression of a body. You can tie the belt in a bow.
  6. Embroider a face. The original pattern shows how to make a face using some cute buttons, or you can embroider two half moon shapes like I have. I like mine like this, as it is totally safe for toddlers and looks like the doll is sleeping.

And that’s it! Enjoy your new Rey doll. I’m now going to use Star Wars Day to finally get around to watching Rouge One. Somehow I completely missed it in the cinema last year; it’ll be the first Star Wars film I haven’t seen in the cinema. I’m a little sad about that (can’t believe I missed it) but now I’ve got a Rey dolly to comfort me!

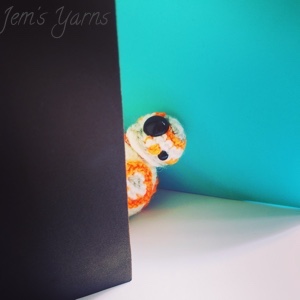
My other little Star Wars make will be joining me too!

30-04-17
Jem's Graphs is Here

What a month it’s been! Did you see my blog post about making a cool crochet app? Well, I began making that at Hacksoton on 1st April. It is now 30th April and it’s ready to launch! Woooo!

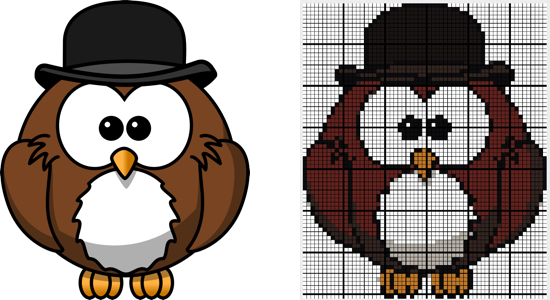
Here's one of my sample images on the left, and the graph which JemsGraphs.com generates

Wait, what is it again?
I made a cool app which takes an image, and turns it into a graph. A crocheter can then use that graph to make a blanket. It’s now online at JemsGraphs.com There’s been a lot of love poured into this app, including things like a live demo right there on the home page, a painting function and a yarn shopping list.

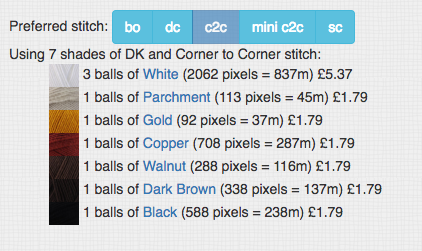
Here's the shopping list for the owl graph, cool huh?

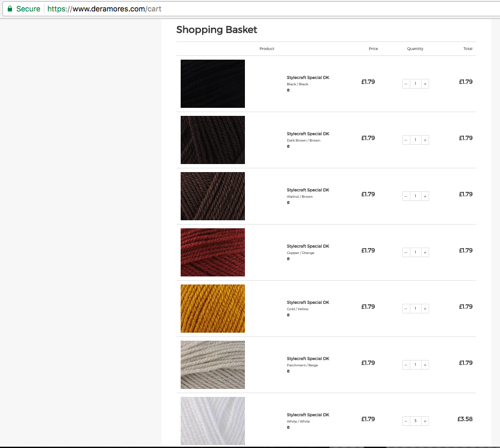
What I really love is that I imported a list of Stylecraft yarns, and now the app uses that list to auto select a palette of colours. So basically, there’s no guessing which yarns match up to the picture as it tells you right there! I’ve also spent some time crocheting small graphs in different stitch styles. This means you can select which stitch you want and Jem’s Graphs will tell you how much of each yarn you need. It also translates that into the number of balls you’d need to buy AND how much that’ll cost. I’ve also hooked up each picture of the yarn to the relavent page on Deramores so you can buy it if you need to. Someone who is logged in can also access a neat “Check out at Deramores” button which will fill your Deramores basket automatically!

Here's the import into the Deramores shopping basket. I've been a bit cheeky here, don't know how long I'll get away with this for!

Join my launch party
Tonight it is #CraftHour and #HandmadeHour on twitter. I am joining in with my Twitter account JemsYarns and I’m going to live crochet one of the graphs from the homepage. I am looking forward to it hope to see you there!

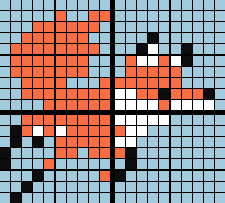
I love foxes, and have used the homepage demo to create this small fox graph which I will attempt to have crocheted by the end of #HandmadeHour tonight!

PS for reading this far use the code BLOGBESTIES for 60% off of my Jem’s Graphs site, so you can upload your own images to turn into graphs. Just it add in the coupon code box when you sign up!

21-04-17
Nuts About... Crochet!

The Nuts About Squares CAL is beautiful

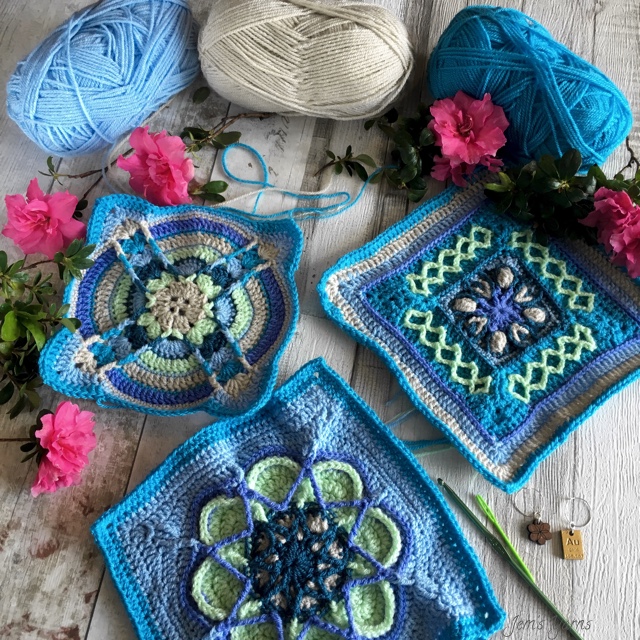
Three weeks ago, something very exciting began. Esther from It’s all in a Nutshell launched her amazing Crochet-A-Long “Nuts About Squares” and the online crochet community went - well - nuts for her brilliant project. The anticipation had been huge, the wait so long, and finally we were able to get started on the first design of 12.

I had decided to use my firm yarn favourite of Stylecraft Special DK, as I knew how soft and gorgeous it already is and I didn’t feel comfortable buying a new yarn from the Netherlands without already having had experience of it. One day I’m sure I’ll get my hands on some Scheepjes yarn and maybe even be converted, but that day is some way in the future when I feel more confident in my crochet skills.

So I decided on following the Nuts about Sea colourway using the Special DK line, which as it turns out uses the same colour codes as Scheepjes anyway. So I looked at the colours assigned for the colour crafter yarn and used the same colour codes which gave me the following colours:

ColourYarn
A4 x Turquoise
B3 x Cloud Blue
C2 x Bluebell
D3 x Petrol
E3 x Spring Green
F2 x Parchment

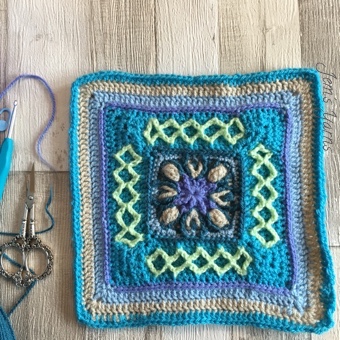
Week one was a pattern by designer Dedri, of Sophie’s Universe fame. I was delighted that we started with a designer I was already familiar with. The square took me quite a while, and by the time I had finished just one, it was time for the second.

Week 1 was Esme's Winter Cottage by Dedri Uys

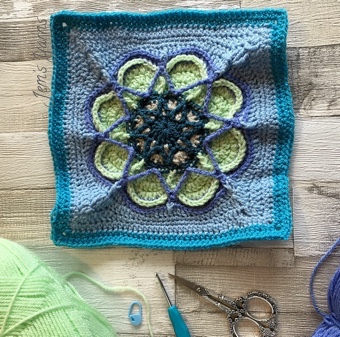
I enjoyed the second square as well, and learnt how to make front post double treble stitches to make up the star pattern. This one was by Helen Shrimpton and I enjoyed it just as much as the first. I think the front post double trebles pulled the square taught in places but hopefully this will be sorted when I block the squares.

Week 2 was Spiro Star designed by Helen Shrimpton

Week three was a welcome change of pace with a pattern from Polly Plum. I found it was an easier pattern to crochet, again honing those front post double treble stitches. I’ve made so many of those now I have managed to successfully make them without the top of the stitch being baggy.

Week 3 was Denna designed by Polly Plum

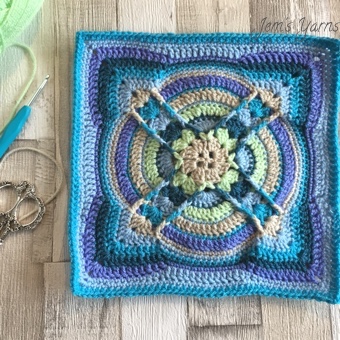
I am now on my way to starting week four, which is a square called Le Vesinet from designer Sigrun Hugoey and starts with nine individual circles. I’ve made up my first set of circles and have watched Esther’s video showing how to join them. I’m not used to getting my yarn needle out so early in a pattern!

Week 4 is Vesinet by Sigrun Hugoey, and starts in a way which is completely new to me

14-04-17
Meet Meep Sheep

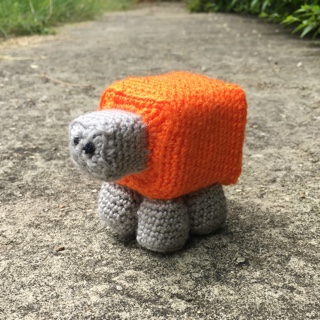
Meet Meep Sheep, the orange mascot of Minecraft & Meltdowns Autism support group

Through my work with my local Makerspace I have met a wonderful woman called Michelle. She is the moderator of a large Facebook group called Asperger’s Adventures - Minecraft and Meltdowns, a social group which acts as a support of Autism families. It has grown so much in the last couple of years that she now organises an annual event specifically catering for children with Autism and their families, which our Makerspace attends with our 3D printers and toys in tow. I went last year and took my crochet with me. Next thing I knew, I am hard at work crocheting their mascot named Meep Sheep.

Meep Sheep is based on the sheep from Minecraft, he is a square shape and is bright orange to stand out in a flock of white. He looks the other way from the sheep because he feels different (but not any less!)

I had a look around for patterns for cube and cuboid amigurumi and arrived at a distinct group of stitches which give a defined corner in the flat piece of crochet. By grouping a double crochet, treble and double treble together in one stitch, followed by a treble and double crochet in the next stitch you get a nice right angle suitable for making a square. The technique is a little tricky, but with practice it comes out lovely!
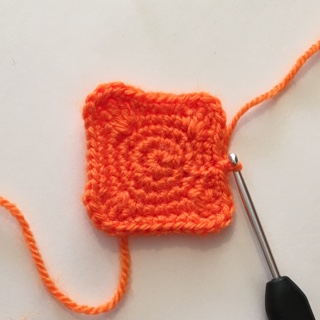
The clusters of dc, tr and dtr stitches at the corners give a neat right angle

So here is the pattern for him, he’s completely free to make but if you’re thinking of selling him please contact me as I’d prefer for the profits from his sales go into the Minecraft & Meltdowns group. I also sell him (not-for-profit), so if you can’t crochet you can still buy one at my Etsy store.
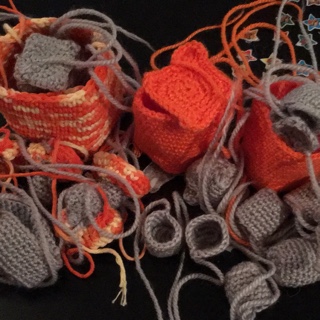
Amigurumi can be a messy business, blink and suddenly you're surrounded by lots of plushie parts!

Free Pattern: Meep Sheep

Pattern Notes

Each cuboid is made in two parts. Part one starts as a flat square, you then work in the back loops only (BLO) around the edge to help grow the square from a flat shape to a cubiod with one flat square and four vertical sides. Part two is a second flat square which you then stitch onto part one to make a closed 3D shape.

While amigurumi is usually made in continuous rounds, because of the nature of the cuboid shape this is made in joined rounds. This means each round begins with a ch1 and ends with a sl st join. This keeps the corners of the cuboid well defined.

Crochet terms

This pattern is written in British crochet terms. Here’s what the abbreviations mean with US terms alongside.

TermUK termUS terms
BLOwork in the Back Loops Onlyback loops only
dcdouble crochetsingle crochet
dtrdouble treble crochettreble crochet
ch1chain 1chain 1
sl stslip stitchslip stitch
trtreble crochetdouble crochet

Materials

Orange & grey acrylic yarn, craft foam sheet, toy stuffing, a small weight (eg a coin), black embroidery thread, and a hook one size smaller than you’d usually use.

Amigurumi is worked tightly to make sure no holes appear in the crocheted fabric. This usually means you need to use a hook one size smaller than recommended by the yarn label. EG if you use double knit like I have, you will use a 3mm hook.

Head Part 1 (grey)

  1. Work 8 dc into a magic ring, sl st join (8)
  2. ch1 and 2dc into same stitch, *2 dc in the next stitch* repeat from * to * to the end of the round, sl st join (16)
  3. ch1 and dc into same stitch, *dc, 2 dc in the next stitch, dc, dc* repeat around, sl st join (20)
  4. ch1 and dc into same stitch, * dc, dc then tr then dtr in same stitch, tr then dc in same stitch, dc, dc * repeat around, sl st join (32)
  5. Working in the back loops only (BLO), ch1 and dc in same stitch, dc into each stitch around, sl st join (32)
  6. ch 1 and dc in same stitch, dc in each stitch and slip stitch join (32)
  7. to 12. ch1 and dc in same stitch, dc in each stitch and slip stitch join. (32) Repeat this round for 6 rounds to give 12 rounds in total.

FO and leave a long tail for sewing.

Head Part 2 (grey)

  1. Repeat rounds 1 to 4 of Head Part 1. This will give you a flat square which can act as a lid to Part 1.
  2. Finish off and leave a long tail for sewing.

Re-enforce the Head Part 1 with craft foam, fill with stuffing, top with a square of foam and sew on Head Part 2 like a lid.

Body Part 1 (orange)

  1. Work 8 dc into a magic ring, sl st join (8)

  2. ch1 and 2dc into same stitch, *2 dc in the next stitch* repeat from * to * to the end of the round, sl st join (16)

  3. ch1 and dc into same stitch, *dc, 2 dc in the next stitch, dc, dc* repeat around, sl st join (20)

  4. ch1 and dc into same stitch, * dc, dc then tr then dtr in same stitch, tr then dc in same stitch, dc, dc * repeat around, sl st join (32)

  5. ch1 and dc in same stitch, dc in the next two stitches, *dc then tr in the next stitch, tr then dc in the next stitch, dc in the next 6 stitches* repeat from * to * twice, dc then tr in the next stitch, tr then dc in the next stitch, dc in the next three stitches, sl st join (40)

  6. Working in BLO, ch1 and dc in same stitch, dc into each stitch around, sl st join (40)

  7. to 20. ch1 and dc in same stitch, dc in each stitch and slip stitch join. (40) Repeat this round for 14 rounds to give 20 rounds in total.

Finish off and leave a long tail for sewing.

Body Part 2 (orange)

  1. Repeat rounds 1 to 5 of Body Part 1. This will give you a flat square which can act as a lid to Part 1.
  2. Finish off and leave a long tail for sewing.

Re-enforce the Body Part 1 with craft foam, add a little weight into the body, fill with stuffing, add a square of foam and sew on Body Part 2 like a lid.

Legs (grey)

Make 4 legs

  1. Work 8 dc into a magic ring, sl st join (8)

  2. ch 1 and dc into same stitch (counts as the first dc in following group) * dc then tr then dc in the same stitch * repeat around to make 4 corners, sl st join (16)

  3. ch1, Working in BLO dc in each dc around, sl st join (16)

  4. to 9. ch1, dc in same stitch, dc in each stitch around, sl st join (16)

Finish off and leave a long tail for sewing. Re-enforce each leg with craft foam and then stuff.
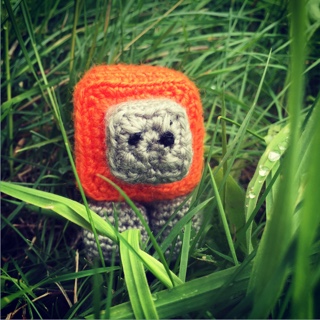
Meep Sheep enjoying the grass

Making up Meep Sheep

I usually choose the side of the body with the ridge of joins as the underside. Sew the four legs to the underside of the body, and then sew the head to the front of the body. Sew French knots with embroidery thread for eyes.

Meep Sheep is finished!

If you make one, please tag me in a photo on twitter or Instagram, or by finding the Minecraft & Meltdowns group and uploading it into there. I’d love to see your creation! If you have any questions about the pattern please leave a comment below. I’ve tried my best to keep it readable, but it sometimes got tricky with so many stitches being worked into the corner stitches.
07-04-17
An idea is born at Hacksoton

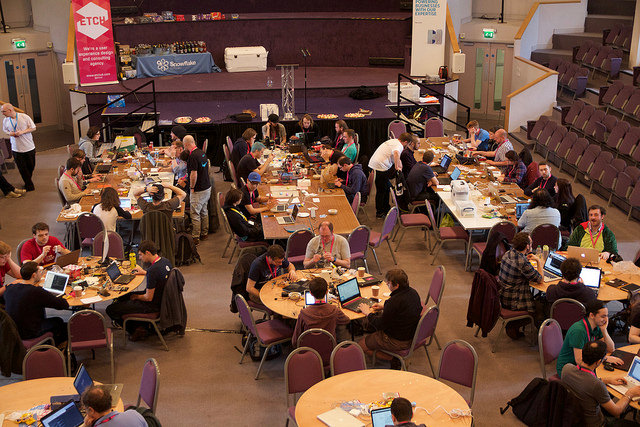
Makers descend on Southampton Central Hall photo: Phil Dye

As a maker at heart, I love events like Hacksoton. It’s a chance to come together with like minded people for an entire day of caffeine-fueled hacking, making and programming. Many useful tools have been made in previous years (like my Wissues App for GitHub issue sorting) as well as lots of toys (like this)

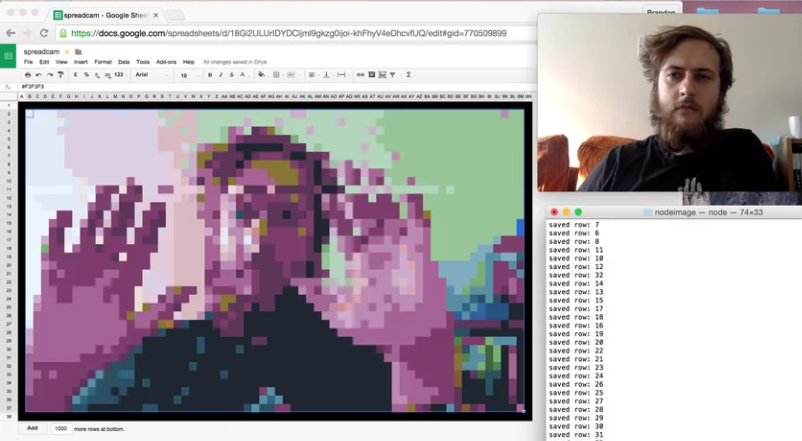
A couple years ago, there was one project called Spreadcam by Brandon which my crafty friends and I thought would have an application for making quilt patterns. Essentially, Spreadcam takes the video feed from your webcam and turns it into a spreadsheet. We thought it was pretty cool, and wondered if we could use it to make a grid of squares for a picture quilt.

Isn't that cool? And it was in real time too!

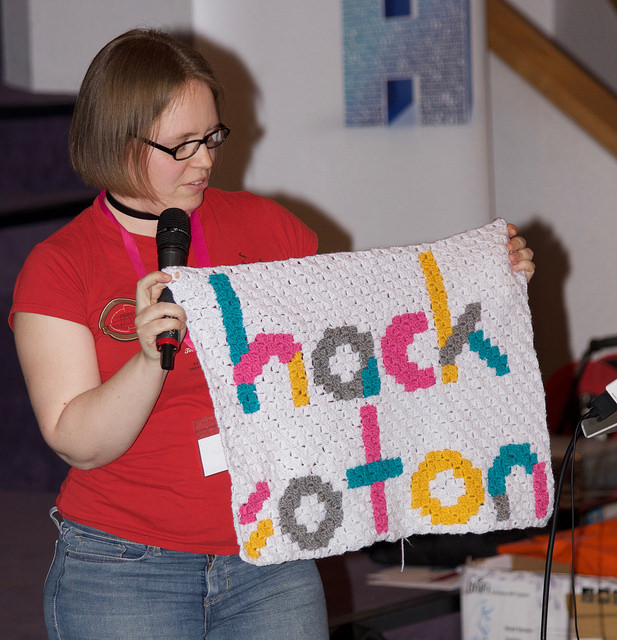
Fast forward to 2017 and it was time for Hacksoton again. Now I crochet I had begun to think about Spreadcam again, and realised that it would also be an interesting tool to make a graphgan pattern with. I had never crocheted a graphgan style blanket before, so my first task was to make a graph the traditional pen-and-paper way and crochet a blanket from it. What better thing to crochet than the Hacksoton logo? I literally traced the logo onto graph paper, and decided which squares of the grid were to be coloured in. The process was a little difficult as the logo is very rounded but I managed to get a good pixellated version of the logo.

My blanket in progress

The actual crocheting wasn’t too difficult. I made it in the well-known corrner-to-corner style where one starts in the bottom right corner of the blanket and works in diagonal rows to the top left corner. Each pixel was made up of a ch3 and three trebles. Colour changing was easy-peasy so long as I kept to the chart. The only difficult bit was actually following the chart as working on the diagonal was confusing. You can see in the picture that I ended up crossing through each diagonal row as I went to keep track.

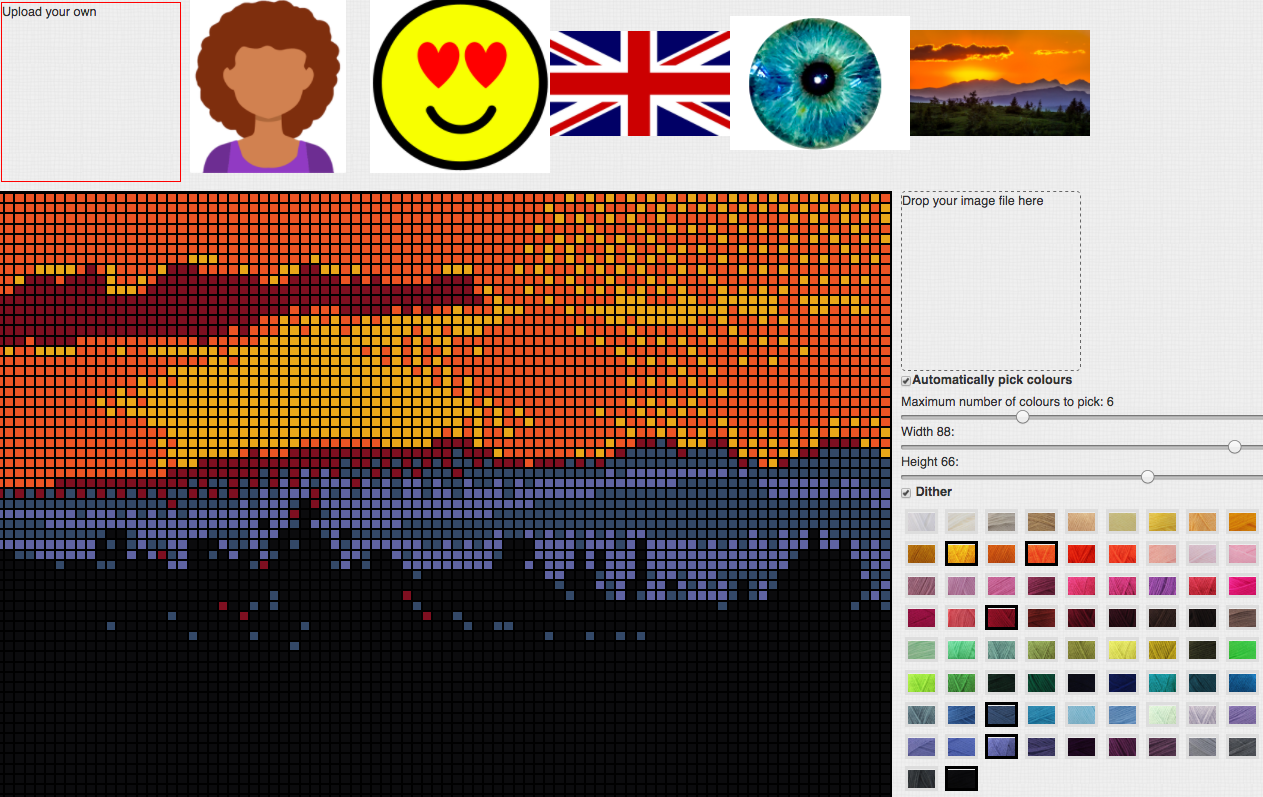
So come the day I turned up with my blanket and laptop and got to work. While Spreadcam was the initial inspiration, I started coding from scratch as I thought it’d be better to work from a photo a user uploads. By lunchtime I had a working demo, which worked from some sample images and drew the image into a pixellated chart. After lunch, I downloaded the yarn thumbnails of Stylecraft Special DK and had the program match the picture colours to the yarn colours. This meant that suddenly, the program was using a defined palette which made things look amazing.

The app I wrote on the day

In the future I want to add a shopping list showing which yarns and how much of each to buy, plus an estimate of the cost. It would also be cool to allow the user to alter the generated image with a paint tool, and generate a written pattern to follow.

My talk at the end of the day showing off my blanket and my app photo: Phil Dye

The day was rounded out with a visit to the pub with some of our Hacksoton friends. It was at this point that the blanket really came into its own and went from cool thing I had made to a warm thing to wrap yourself in!

All in all, another enjoyable day and I actually managed to get a project finished in a day which is unusual for me! My many thanks to the Hacksoton team and their wonderful sponsors for supporting amateur, professional and first-time programmers in this free, supportive and exciting environment

Some of the awesome photos have come from Phil Dye