31-01-18
A Cygnet Yarns earwarmer

A gorgeous yarn
A gorgeous yarn

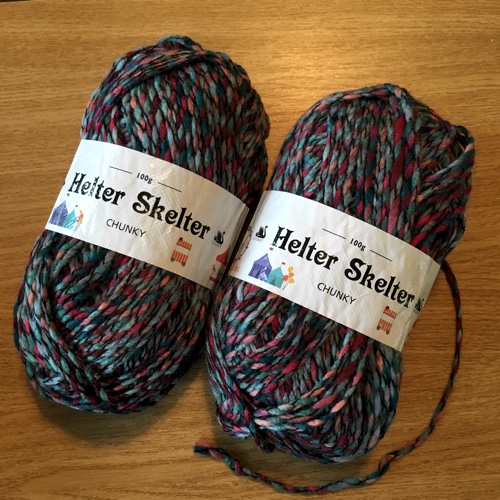
Recently, I was fortunate enough to receive some brand new yarn from Cygnet Yarns. This is a chunky weight multicoloured yarn called Helter Skelter. I’ve looked on their site and it doesn’t seem to be released yet!

It works up really nicely, with blues and pinks twisting around each other. When worked up in treble crochet you get lovely flecks of all the different colours.

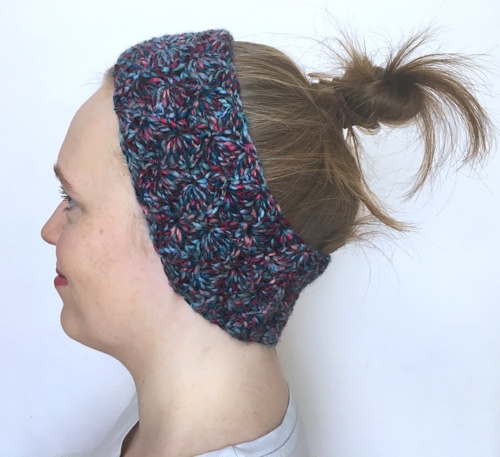
With the weather changing and getting warmer I decided it was time to stop wearing my hat and hook up something a little cooler for the school run. I still want my ears covered in the frosty mornings, but like having my hair tied up away from my face. I settled on a pattern using shell stitch, which shows off the colours of the yarn rather nicely without too much fussy textured detail.

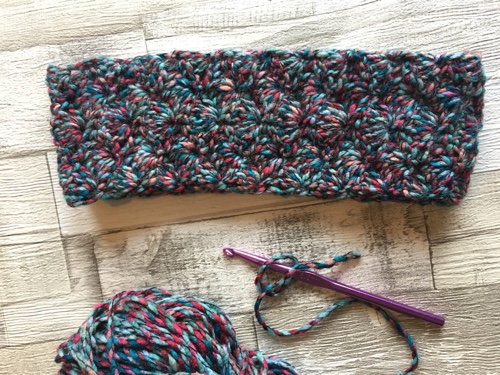
The ear warmer is made in shell stitch along the width of the piece

Free Pattern: Shell stitch ear warmer

Pattern Notes
This simple ear warmer headband is along the width of the material to the desired length, if you’re making it for yourself you can regularly wrap it around your head until it is the length you need. If you’re making a gift then stop at 20" (50.5 cm) for teenagers, 22" (56 cm) for adult or 24" (61 cm) for large adult. This is around the standard sizes for hats and includes a snug fit to allow the headband to stretch a little.

This pattern specifically uses the new Helter Skelter yarn from Cygnet Yarns, however it could be substituted with other multicoloured yarns of the same weight category (Chunky, weight 5).

Stitch counts are given in [square brackets] at the end of each row.

Materials
1 ball of Cygnet Yarn Helter Skelter Chunky Yarn in Tornado shade
6 mm hook

Crochet Terms
Written in UK terms:

TermUK termUS term
ch1chain 1chain 1
dcdouble crochetsingle crochet
htrhalf treble crochethalf double crochet
sk2skip 2 stitchesskip 2 stitches
sl stslip stitchslip stitch
ststitchstitch
trtreble crochetdouble crochet

Pattern

  1. Foundation Chain - chain 13.
  2. ch1, dc in each ch across [13 dc]
  3. ch3 (counts as tr), 2 tr in same space, sk2, dc, sk2, 5tr, sk2, dc, sk2, 3tr [2 half shells, 2 dc, 1 full shell]
  4. ch1, dc, 5tr in next dc, sk2, dc in middle tr, sk2, 5tr in next dc, sk2, dc in last st [dc, shell, dc, shell, dc]

Rows 3 & 4 set the pattern for the piece. Repeat the pattern until 0.5" (1cm) under the desired length.

Last row. ch1, dc, *(dc, htr, tr, htr, dc, dc)* repeat the section between the *s twice

Joining. Fold the piece in half with right sides facing. Slip stitch the ends together in the outside loops. Turn the head band inside out. All done!

Nice and warm ears
Nice and warm ears

04-05-17
A Rey of sun for Star Wars Day

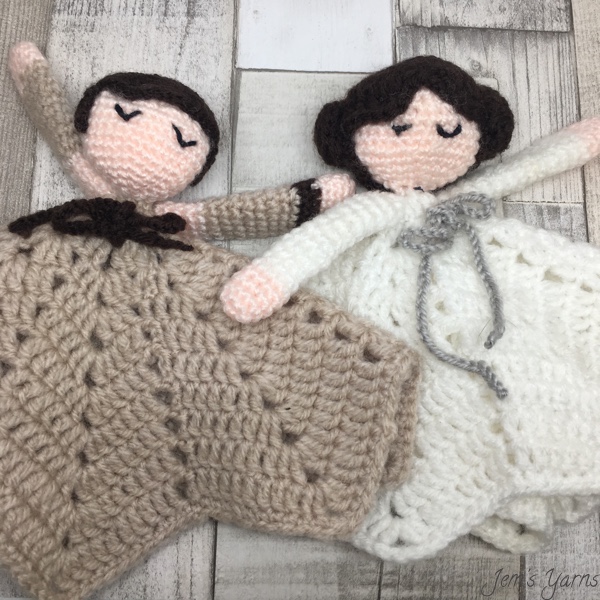
Two lovely lovies
Two lovely lovies

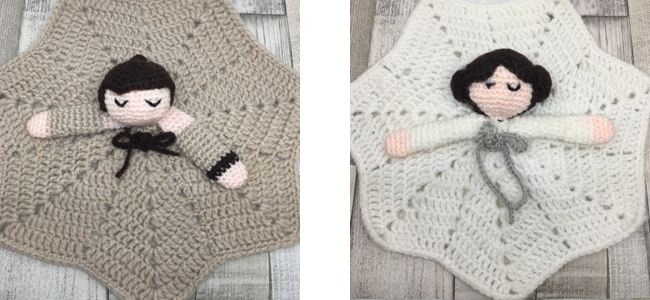
It’s May the fourth and Star Wars Day! I am a huge Star Wars fan, so one of the first patterns I ever followed was for Princess Leia. I found it easy to follow, and she’s a cute lovie who sits on my headboard.

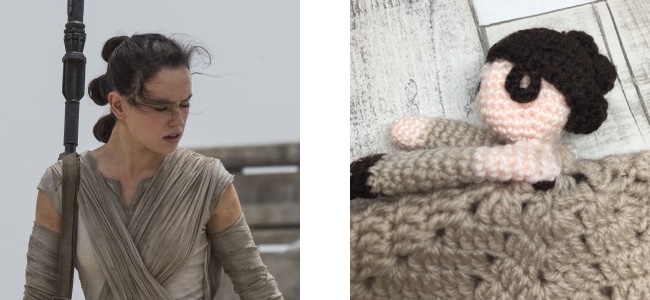
Back at the release of The Force Awakens, I decided to adapt the pattern to make Rey. I absolutely love this character, she’s strong and confident, and she’s a tinkerer; she’s right up my street.

Free Pattern: Star Wars Rey Lovie Pattern

Pattern Notes
This pattern references the Princess Leia pattern from Stuff Susie Made, so make sure to have a look at that page too. The dress is made in joined rounds with a slip stitch join, however the head and arms can be made in continuous rounds if you choose to do so. I used a 4mm hook for the dress as it’s quite lacy, then went down to a 3mm hook for the head and arms to avoid the stuffing showing in holes.

This pattern is free because the character belongs to Disney. So feel free to make one, but remember you shouldn't sell items made from the pattern because you don't have the licensing.

Crochet terms
I’ve written this pattern in American terms to go hand in hand with the reference pattern. (I usually write in British terms, but that would be too confusing here). Here’s what the abbreviations mean with UK terms alongside.

TermUS termUK terms
dcdouble crochettreble crochet
ch1chain 1chain 1
scsingle crochetdouble crochet
sc incsingle crochet increasework two double crochet into the same stitch
sl stslip stitchslip stitch

The number of stitches in each round is given in brackets, it’s a good idea to keep count!

Materials
Double knit weight yarn in flesh tone, beige and dark brown. I used Stylecraft Special DK in Soft Peach, Parchment and Dark Brown respectively. You also need a 4mm hook, a 3mm hook, toy stuffing and black embroidery thread.

Dress and head
Follow the pattern at Stuff Susie Made for the dress and head, using beige and flesh yarn. Remember to leave a long tail of yarn from the head as you’ll need this for sewing later.

Hair
The hair piece is stitched on top of head like a skull cap. You first make a circle, then add a loop of chains on each side of the hair. You also need to make up three small buns which will later be stitched in a vertical line on the back of the head.

It was quite fiddly to fit all the buns in as well as the strands of hair at the side of Rey's head

Using dark brown:

  1. work 6 sc into a magic ring, join round with sl st. (6)
  2. sc inc into each st (12)
  3. *sc, sc inc* repeat 6 times (18)
  4. *2 sc, sc inc* repeat 6 times (24)
  5. *3 sc, sc inc* repeat 6 times (30)
  6. *4 , sc inc* repeat 6 times (36)
  7. *5 sc, sc inc* repeat 6 times (42) Fasten off.

Now were are going to make a chain for the wisp of hair over the ear, the back of her hair and then the wisp of hair over the opposite ear.

  1. ch10, sl st to next sc, ch2 (counts as dc), 23 dc, ch10 sl st in next sc (24 dc and two ch10 loops)
  2. Turn your work, ch2 (counts as dc), 23 dc (24 dc) Fasten off.

Large bun

  1. work 6 sc into a magic ring (6)
  2. sc inc into each st (12)
  3. sc into each st (12) Fasten off.

Small buns - make two Work rounds 1 and 2 of the large bun.

Arms - make two

Again, this pattern is based on the pattern for Princess Leia, except with more colour changes as Rey has bare shoulders and wears a wrist cuff on one arm. For her left arm, follow this pattern, then for her right arm follow it again but rounds 6 and 7 should be in beige yarn.

  1. In flesh tone, work 5 sc into a magic ring (5)
  2. sc inc in every sc (10)
  3. to 5. sc in every sc (10)
  4. Switch to dark brown and sc in every sc (10)
  5. sc in every sc (10)
  6. Switch to beige and sc in every sc (10)
  7. to 15. sc in every sc (10)
  8. Switch to flesh tone and sc in every sc (10)
  9. to 19. sc in every sc (10) Fasten off.

Belt

Work a chain in dark brown yarn until it measures around 35 cm.

Making up

This should give you an idea of what you're aiming for, but don't forget to check out the reference pattern for some extra pointers
  1. Sew hair to head. You can choose to leave the ch10 wisps of hair free or use a stitch at in the middle of the chain to fix them to the sides of Rey’s head.
  2. Sew the three buns to the back of the head in a vertical line.
  3. Sew head to centre of the dress. I found it easiest to fold the dress into half and work the tail of yarn from the head through several stitches of the dress. You’ll find a way to do this securely, I’m sure.
  4. Sew the arms to the dress underneath the head. The one with the line of dark brown is Rey’s left arm.
  5. Thread the belt through the stitches of round 5 or 6, whichever looks better. You can then pull the belt a little tight so that you bunch up the early rounds of the dress to make the impression of a body. You can tie the belt in a bow.
  6. Embroider a face. The original pattern shows how to make a face using some cute buttons, or you can embroider two half moon shapes like I have. I like mine like this, as it is totally safe for toddlers and looks like the doll is sleeping.

And that’s it! Enjoy your new Rey doll. I’m now going to use Star Wars Day to finally get around to watching Rouge One. Somehow I completely missed it in the cinema last year; it’ll be the first Star Wars film I haven’t seen in the cinema. I’m a little sad about that (can’t believe I missed it) but now I’ve got a Rey dolly to comfort me!

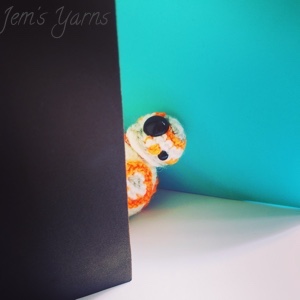
My other little Star Wars make will be joining me too!

14-04-17
Meet Meep Sheep

Meet Meep Sheep, the orange mascot of Minecraft & Meltdowns Autism support group

Through my work with my local Makerspace I have met a wonderful woman called Michelle. She is the moderator of a large Facebook group called Asperger’s Adventures - Minecraft and Meltdowns, a social group which acts as a support of Autism families. It has grown so much in the last couple of years that she now organises an annual event specifically catering for children with Autism and their families, which our Makerspace attends with our 3D printers and toys in tow. I went last year and took my crochet with me. Next thing I knew, I am hard at work crocheting their mascot named Meep Sheep.

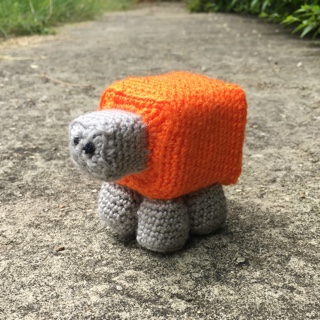
Meep Sheep is based on the sheep from Minecraft, he is a square shape and is bright orange to stand out in a flock of white. He looks the other way from the sheep because he feels different (but not any less!)

I had a look around for patterns for cube and cuboid amigurumi and arrived at a distinct group of stitches which give a defined corner in the flat piece of crochet. By grouping a double crochet, treble and double treble together in one stitch, followed by a treble and double crochet in the next stitch you get a nice right angle suitable for making a square. The technique is a little tricky, but with practice it comes out lovely!
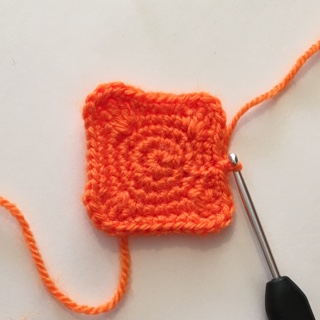
The clusters of dc, tr and dtr stitches at the corners give a neat right angle

So here is the pattern for him, he’s completely free to make but if you’re thinking of selling him please contact me as I’d prefer for the profits from his sales go into the Minecraft & Meltdowns group. I also sell him (not-for-profit), so if you can’t crochet you can still buy one at my Etsy store.
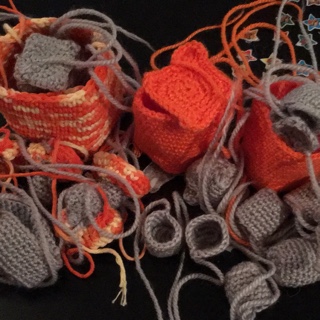
Amigurumi can be a messy business, blink and suddenly you're surrounded by lots of plushie parts!

Free Pattern: Meep Sheep

Pattern Notes

Each cuboid is made in two parts. Part one starts as a flat square, you then work in the back loops only (BLO) around the edge to help grow the square from a flat shape to a cubiod with one flat square and four vertical sides. Part two is a second flat square which you then stitch onto part one to make a closed 3D shape.

While amigurumi is usually made in continuous rounds, because of the nature of the cuboid shape this is made in joined rounds. This means each round begins with a ch1 and ends with a sl st join. This keeps the corners of the cuboid well defined.

Crochet terms

This pattern is written in British crochet terms. Here’s what the abbreviations mean with US terms alongside.

TermUK termUS terms
BLOwork in the Back Loops Onlyback loops only
dcdouble crochetsingle crochet
dtrdouble treble crochettreble crochet
ch1chain 1chain 1
sl stslip stitchslip stitch
trtreble crochetdouble crochet

Materials

Orange & grey acrylic yarn, craft foam sheet, toy stuffing, a small weight (eg a coin), black embroidery thread, and a hook one size smaller than you’d usually use.

Amigurumi is worked tightly to make sure no holes appear in the crocheted fabric. This usually means you need to use a hook one size smaller than recommended by the yarn label. EG if you use double knit like I have, you will use a 3mm hook.

Head Part 1 (grey)

  1. Work 8 dc into a magic ring, sl st join (8)
  2. ch1 and 2dc into same stitch, *2 dc in the next stitch* repeat from * to * to the end of the round, sl st join (16)
  3. ch1 and dc into same stitch, *dc, 2 dc in the next stitch, dc, dc* repeat around, sl st join (20)
  4. ch1 and dc into same stitch, * dc, dc then tr then dtr in same stitch, tr then dc in same stitch, dc, dc * repeat around, sl st join (32)
  5. Working in the back loops only (BLO), ch1 and dc in same stitch, dc into each stitch around, sl st join (32)
  6. ch 1 and dc in same stitch, dc in each stitch and slip stitch join (32)
  7. to 12. ch1 and dc in same stitch, dc in each stitch and slip stitch join. (32) Repeat this round for 6 rounds to give 12 rounds in total.

FO and leave a long tail for sewing.

Head Part 2 (grey)

  1. Repeat rounds 1 to 4 of Head Part 1. This will give you a flat square which can act as a lid to Part 1.
  2. Finish off and leave a long tail for sewing.

Re-enforce the Head Part 1 with craft foam, fill with stuffing, top with a square of foam and sew on Head Part 2 like a lid.

Body Part 1 (orange)

  1. Work 8 dc into a magic ring, sl st join (8)

  2. ch1 and 2dc into same stitch, *2 dc in the next stitch* repeat from * to * to the end of the round, sl st join (16)

  3. ch1 and dc into same stitch, *dc, 2 dc in the next stitch, dc, dc* repeat around, sl st join (20)

  4. ch1 and dc into same stitch, * dc, dc then tr then dtr in same stitch, tr then dc in same stitch, dc, dc * repeat around, sl st join (32)

  5. ch1 and dc in same stitch, dc in the next two stitches, *dc then tr in the next stitch, tr then dc in the next stitch, dc in the next 6 stitches* repeat from * to * twice, dc then tr in the next stitch, tr then dc in the next stitch, dc in the next three stitches, sl st join (40)

  6. Working in BLO, ch1 and dc in same stitch, dc into each stitch around, sl st join (40)

  7. to 20. ch1 and dc in same stitch, dc in each stitch and slip stitch join. (40) Repeat this round for 14 rounds to give 20 rounds in total.

Finish off and leave a long tail for sewing.

Body Part 2 (orange)

  1. Repeat rounds 1 to 5 of Body Part 1. This will give you a flat square which can act as a lid to Part 1.
  2. Finish off and leave a long tail for sewing.

Re-enforce the Body Part 1 with craft foam, add a little weight into the body, fill with stuffing, add a square of foam and sew on Body Part 2 like a lid.

Legs (grey)

Make 4 legs

  1. Work 8 dc into a magic ring, sl st join (8)

  2. ch 1 and dc into same stitch (counts as the first dc in following group) * dc then tr then dc in the same stitch * repeat around to make 4 corners, sl st join (16)

  3. ch1, Working in BLO dc in each dc around, sl st join (16)

  4. to 9. ch1, dc in same stitch, dc in each stitch around, sl st join (16)

Finish off and leave a long tail for sewing. Re-enforce each leg with craft foam and then stuff.
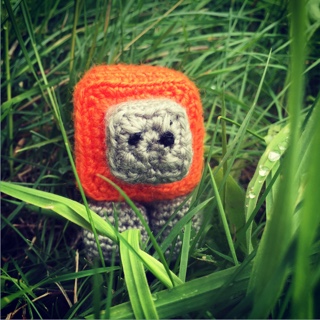
Meep Sheep enjoying the grass

Making up Meep Sheep

I usually choose the side of the body with the ridge of joins as the underside. Sew the four legs to the underside of the body, and then sew the head to the front of the body. Sew French knots with embroidery thread for eyes.

Meep Sheep is finished!

If you make one, please tag me in a photo on twitter or Instagram, or by finding the Minecraft & Meltdowns group and uploading it into there. I’d love to see your creation! If you have any questions about the pattern please leave a comment below. I’ve tried my best to keep it readable, but it sometimes got tricky with so many stitches being worked into the corner stitches.